How to Master Micro Crochet: A Beginner's Guide
How to Master Micro Crochet: A Beginner's Guide

The magic of regular crochet transforms beautifully into something special as it shrinks down to tiny proportions. Micro crochet, a miniature version of our beloved yarn craft, creates intricate projects smaller than you can imagine. The sort of thing I love about this technique is how it allows us to craft everything from tiny animals to flowers that are smaller than a penny.
"Is it hard to crochet these miniature wonders?" This question comes up often from fellow crafters. Micro crochet needs specific techniques, but we can break everything down into simple, manageable steps. This piece will help you understand micro crochet fundamentals, select the right tools, and complete your first tiny project. My proven tips and tricks will help you become skilled at this captivating craft without eye strain or frustration.
Understanding Micro Crochet Basics
Welcome to the fascinating world of micro crochet! My years of experience with hooks and yarn have taught me that micro crochet is regular crochet's adorable mini-me version. This delicate craft creates tiny, intricate pieces with very fine thread and hooks smaller than a pencil lead.
What is micro crochet?
Micro crochet miniaturizes regular crochet projects to fit in your palm. This delicate technique creates stunning jewelry that amazes friends and tiny dollhouse accessories that spread joy. The technique requires no new stitch learning - just the same methods you know, scaled down to create pieces smaller than your fingernail.
Materials and tools needed
Here's everything you need in your micro crochet toolkit:
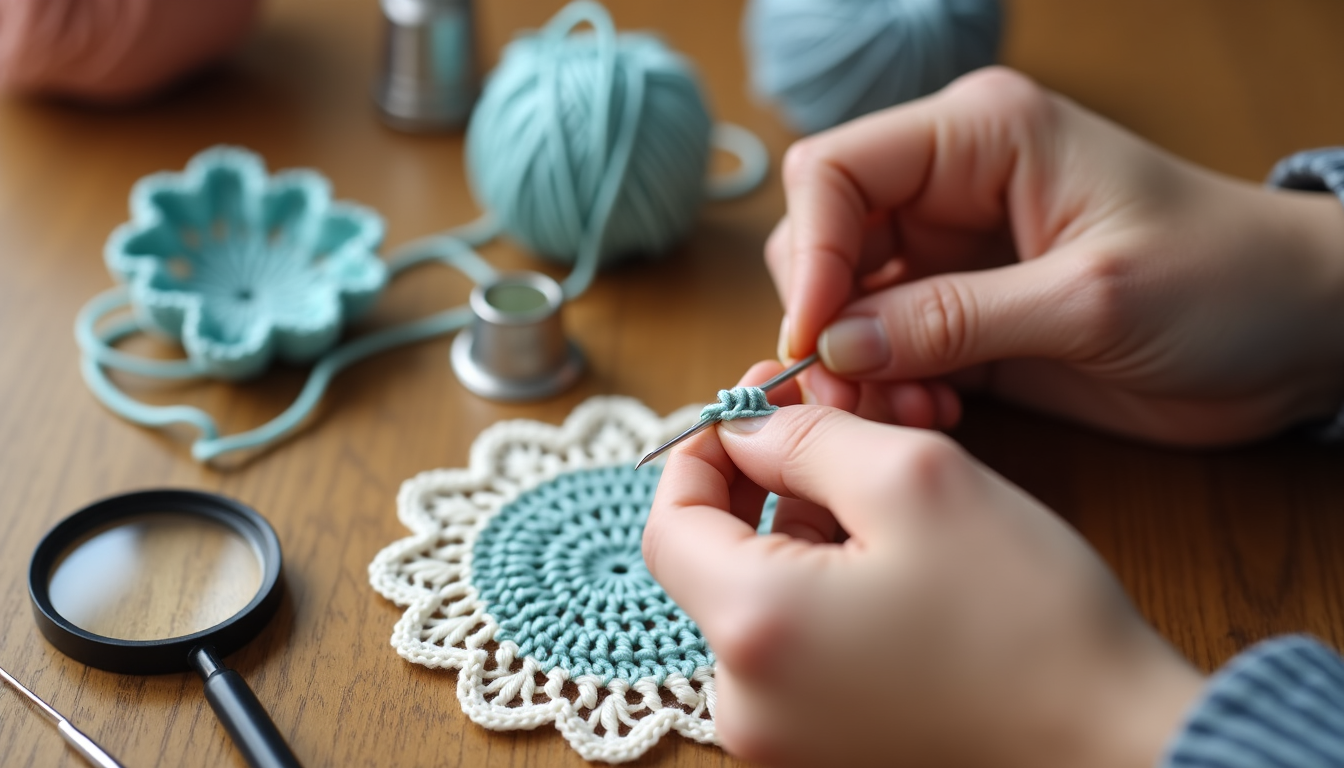
Tiny Hooks: These are incredibly small - usually between 0.4mm to 1mm in diameter
Fine Thread: Regular yarn won't work here - you'll need super-fine threads (usually size 80 or higher)
Good Lighting: This one's absolutely essential
Magnification: A magnifying glass or special crafting glasses will make your life easier
Light-colored thread works best when you start because it helps you see those tiny stitches clearly. A spot near a window or a quality desk lamp will protect your eyes while you work. Your eyes will appreciate this setup immensely.
Differences from regular crochet
The biggest difference between micro crochet and its bigger cousin? Size, obviously! There's more to it than just being tiny though. Working with micro crochet brings unique challenges:
Micro crochet demands more precision and patience than regular crochet. Artists create pieces that serve as delicate jewelry or miniature decorations. The simple techniques stay the same, yet the material's fineness needs extra attention to detail.
Micro crochet suits people who love challenges and have patience. You can work on tiny masterpieces anywhere since it needs minimal space. But let's be clear - regular crochet might be a better starting point if you get frustrated easily or struggle with small elements. This approach helps build your skills first.
Note that these familiar stitches just get a tiny makeover. Your first completed micro project will get you hooked (pun totally intended!).
Essential Techniques for Micro Crochet
Want to level up your micro crochet game? Let's tuck into the essential details that will make your tiny creations shine!
Choosing the right hook and thread
My first attempt at micro crochet taught me a valuable lesson. Using a regular hook felt like painting a masterpiece with a house paintbrush! Experience has shown that you need hooks between 0.4mm to 0.6mm for the finest work, though beginners might want to start with 0.75mm to 1mm hooks.
The thread choice makes a significant difference. I found that cotton thread tends to be more forgiving than synthetic. It's slightly thicker and easier to handle, though it shows less resistance. Here's what you'll need:
A metal micro crochet hook (wood or plastic just won't cut it at this size!)
Light-colored thread to see better
Sharp scissors to make clean cuts
A protective cap to safeguard your tiny hook
Mastering tension control
The sort of thing I love about tension control in micro crochet is that it resembles taming a tiny dragon - challenging yet achievable! Here's the quickest way to do it:
Pull enough thread from your ball first - fighting with a tight skein is a recipe for inconsistent tension
Wrap the thread around your pinky, across your palm, and between your pointer and middle finger
Keep the tension tight enough to make a slight sound when strummed, but not so tight it snaps
Success comes from finding that sweet spot where [your hook flows smoothly through the stitches without struggling or sliding too freely]. You'll feel like you've discovered a superpower once you get it right!
Reading and adapting patterns
Most regular patterns can become micro crochet patterns! The process is similar to scaling down your favorite recipe to appetizer size. I recommend starting with patterns you're already familiar with, as unstitching micro crochet can be particularly challenging.
Consider these key points:
Start with straightforward, repeating patterns
Keep your stitch count below 24 for very tiny projects
Work under plenty of light
A valuable tip I learned through experience: unlike regular crochet, weaving in ends isn't always stable in micro crochet. Instead, knot the thread and hide it inside your work. This technique has saved many of my tiny creations from unraveling!
Note that working with thread will slow you down - my micro projects take about three times longer than regular ones. The results are worth the extra time and effort. You'll become the creative architect of an adorable miniature world!
Step-by-Step Guide to Your First Micro Crochet Project
Hey crocheters! Let's start an exciting tiny creation journey together. You'll love making your first micro crochet project.
Selecting a beginner-friendly pattern
Smart beginners should start with simple shapes! My students learn best when they begin with basic designs. Egg shapes are perfect starter projects that you can easily transform into various animals. These simple projects help build confidence, and you can create adorable tiny teddy bears or cute little chicks!
Your first project needs these essential items:
Light-colored thread (this really helps!)
A 0.6mm or 0.75mm hook
Magnifying glasses with proper lighting
Lots of patience (and perhaps some chocolate)
Working tiny stitches
The sort of thing I love is getting started with these delicate details! Here's my tried-and-true approach to create those delicate little stitches:
Your workspace needs good lighting
A magnifying glass should sit at a comfortable angle
Your hook works best when held like a pencil
Keep your tension tight enough to make a slight noise when strummed
The first stitch should count as your chain twos
Use a magic ring instead of chain methods for starting rounds
Finishing and blocking your piece
This is the moment to make your tiny creation shine! Wet blocking transforms your piece from bunchy to beautiful, improving drape and setting the stitches perfectly. Experience has taught me that unlike regular crochet, simply weaving in ends isn't enough for micro projects - you'll want to knot the thread and hide it inside your work.
To wet block your micro masterpiece:
Soak your piece for 15-20 minutes in water
Gently squeeze excess water using a towel - no wringing!
Shape while damp and pin to desired dimensions
Let it dry completely near a sunny window
Important Note: Acrylic thread users might find [steam blocking as a better option - just hover the iron about 1cm above the fabric for about 5 seconds per section].
Your first micro crochet project might look a bit uneven - mine did too! Practice leads to perfection, just like regular crochet. Working with thread naturally slows you down, and I see it as meditation with a hook. The amazed expressions on people's faces make your tiny creations even more rewarding!
Tips for Success and Troubleshooting
Let's discuss how to turn micro crochet challenges into tiny victories! My countless hours of squinting at miniature stitches (and maybe a few dramatic sighs) have led to some game-changing tips that will make your micro crochet experience smoother than a well-worn hook.
Proper lighting and magnification
Let me share something that will open your eyes! Poor lighting makes it difficult for the eyes to focus, which can cause short-term eye fatigue. My personal experience taught me this lesson after attempting to crochet with just my bedside lamp - what a mistake that was!
My perfect lighting setup includes:
A bright white lamp that mimics natural daylight
An adjustable desk lamp because position matters
Natural window light whenever available
LED light that offers multiple settings
I sometimes use a magnifying glass when working on very small project or dark colors as these are difficult to see. A good magnifying glass becomes crucial to your work. My recommendation points to a jeweler's magnifying glass with LED lights that helps you master those tiny details perfectly.
Taking breaks and preventing eye strain
Learning this took me way too long: Crocheting for extended periods of time without taking breaks can lead to eye strain, hand cramps, and other discomforts.
Common mistakes and how to avoid them
I'd like to share some wisdom from my own "oops" moments. The very first thing that we have to talk about is tension because tension is one of the biggest complaints from beginners.
Tension control requires attention:
If your tension is too tight it'll be really hard to get your stitches into that beginning chain
When you have a loose tension it would result in looser stitches of course and possibly more holes in your project
A helpful tip: if your foundation chain is too tight try using a hook that's one size larger than what the pattern calls for and then switch back to the original size for the rest of the pattern.
Beginners often make mistakes by choosing the wrong yarn. As a beginner you should use yarns that have one single color and it should be lighter so that it's easy to really see count and recognize those stitches and mistakes. stay away from variegated yarn stay away from fluffy yarn and stay away from black yarn - your eyes will appreciate this advice.
This lifesaver tip helps you track your work: if you are going to put away your work what you can do is stop at your last stitch of the row lift up your hook to form a bigger loop grab a stitch marker and insert it into that loop.
You might be surprised to learn that frogging is not a bad thing. frogging means that you're learning it means that instead of leaving that mistake you've recognized that you've made a mistake and you're frogging your work to fix it. Each time you undo your work, you develop better skills.
Important reminder: Practice makes perfect – it took me a long time to get to where I am now, I've been doing micro crochet for years and I still make mistakes!. Be patient with yourself as perfection takes time.
Conclusion
The magical world of micro crochet reveals miniature possibilities to crafters who welcome its unique challenges. You'll find success when you pick the right tools, work with good lighting and master tension control. Simple patterns and light-colored thread help build your skills through patient practice. Your eyes need protection during detailed work, so take regular breaks and use proper magnification.
These tiny masterpieces create endless creative opportunities. You can make delicate jewelry and charming miniature animals no bigger than a penny. Each finished project brings huge satisfaction and builds your confidence to tackle complex challenges. Note that even the most skilled micro crocheters started as beginners - your first tiny stitch marks the beginning of this delightful craft.
FAQs
1.What is the level of difficulty involved in micro crocheting?
Micro crocheting is quite challenging and is generally not recommended for those new to crocheting. It often requires a significant amount of experience in standard crochet, as the stitches can be so small that they are felt rather than seen. Mastery in micro crochet involves a high level of trust in your crochet skills and the tools you use.
2.How does micro crochet differ from mini crochet?
Micro crochet typically involves using a crochet hook of 1mm or smaller, often incorporating sewing thread to create extremely tiny creations that can fit on a fingertip. Mini crochet, on the other hand, uses slightly larger hooks and generally does not produce as small creations as micro crochet.
3.What is the simplest crochet project for a complete beginner?
For absolute beginners, starting with small square coasters or dishcloths is recommended. These projects are manageable in size and complexity, allowing beginners to practice and master new stitches quickly.
4.As a beginner, what do I need to start crocheting?
To begin crocheting, you essentially need some yarn and a crochet hook. It's also beneficial to look up instructional videos or guides online for additional support. Engaging with online communities or forums, such as r/crochet, can also provide inspiration and practical advice to help you get started and overcome any initial challenges.


