How to Revitalize Your Raffia Basket: A Complete Guide to Raffia Bag Dyeing
How to Revitalize Your Raffia Basket:
A Complete Guide to Raffia Basket Dyeing

Raffia baskets have long been cherished for their natural beauty and versatility. However, there comes a time when even the most beloved accessory needs a refresh. Enter the art of raffia bag dyeing - a creative way to breathe new life into your favorite carryall. This comprehensive guide will walk you through everything you need to know about transforming your raffia basket with vibrant hues, from understanding the unique properties of natural raffia to mastering various dyeing techniques. Whether you're looking to update a tired tote or create a custom piece that reflects your personal style, this article will equip you with the knowledge and skills to embark on your raffia dyeing journey with confidence.
Understanding Raffia: Nature's Versatile Fiber
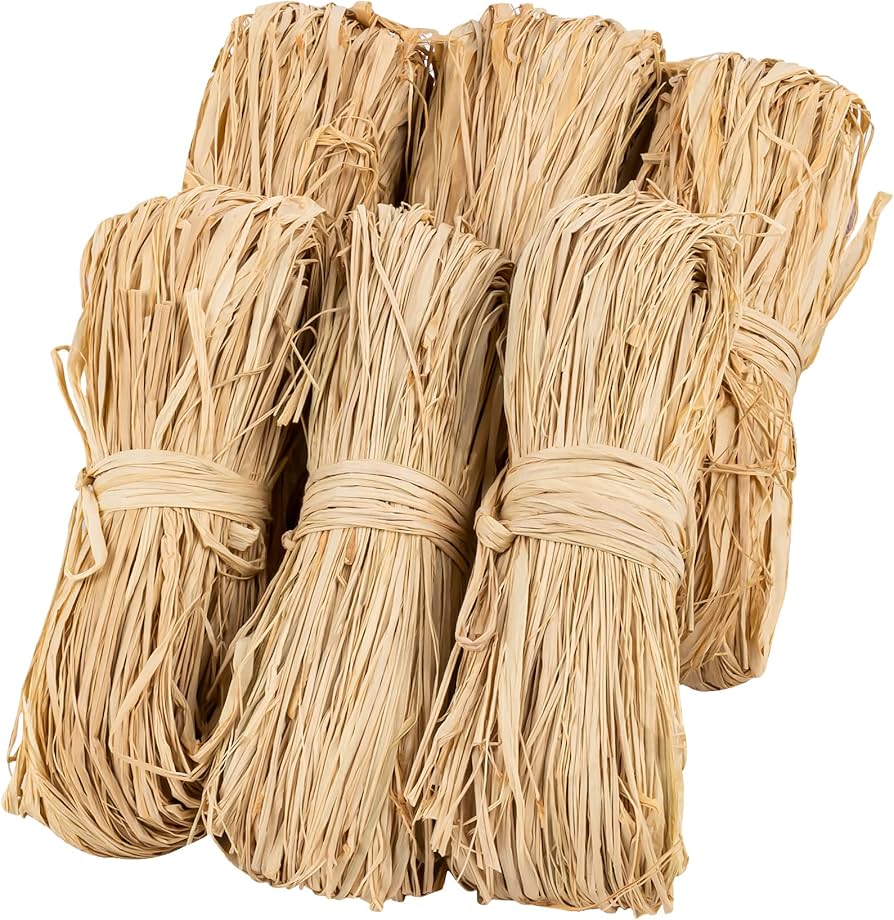
Before diving into the dyeing process, it's crucial to understand the material we're working with. Raffia, derived from the leaves of the raffia palm tree, is a natural fiber known for its strength, flexibility, and eco-friendly properties. This remarkable raffia fiber has been used for centuries in various crafts, including raffia basket weaving, hat making, and, of course, bag construction.
The Unique Properties of Raffia
Raffia fibers possess several characteristics that make them both ideal and challenging for dyeing:
Absorbency: Raffia has a natural ability to absorb liquids, which can be advantageous when it comes to taking on dyes. However, this also means that the dyeing process must be carefully controlled to achieve even coloration.
Texture: The slightly rough texture of raffia cloth can create interesting effects when dyed, often resulting in a rustic, artisanal appearance that many find appealing.
Durability: Raffia is known for its strength, which allows dyed baskets to withstand regular use without losing their shape or integrity.
Natural color variations: Even in its undyed state, raffia can exhibit subtle color differences, which can influence the final dyed result.
Challenges in Dyeing Raffia
While raffia's natural properties make it a wonderful material for baskets, they also present unique challenges when it comes to dyeing:
Uneven absorption: Due to the varying thickness and density of raffia fibers, dye may be absorbed unevenly, requiring special techniques to achieve a uniform raffia color.
Color fastness: Ensuring that the dye adheres properly to the raffia and doesn't fade or bleed over time can be tricky.
Maintaining texture: Overzealous dyeing processes can sometimes alter the desirable natural texture of raffia.
Understanding these properties and challenges is the first step in successfully dyeing your raffia basket. With this knowledge, you can make informed decisions about dye selection and application methods to achieve the best possible results.
Preparing Your Raffia Basket for Dyeing
Before you begin the exciting process of transforming your raffia basket with color, proper preparation is essential. This crucial step ensures that your basket is ready to accept the dye evenly and that the final result will be as vibrant and long-lasting as possible.
Cleaning Your Raffia Basket
Start by thoroughly cleaning your raffia basket to remove any dirt, dust, or oils that could interfere with the dyeing process:
Gently brush the basket with a soft-bristled brush to remove loose debris.
Fill a basin with lukewarm water and add a small amount of mild, unscented soap.
Submerge the basket in the soapy water and gently agitate it to clean all surfaces.
Rinse the basket thoroughly with clean water until all soap residue is removed.
Allow the basket to air dry completely in a well-ventilated area, away from direct sunlight.
Assessing the Basket's Condition
Once your basket is clean and dry, carefully inspect it for any damage or areas that may require special attention during the dyeing process:
Check for loose or frayed fibers and trim them if necessary.
Identify any areas where the weave is particularly tight or loose, as these may absorb dye differently.
Note any existing stains or discolorations that may affect the final color result.
Pre-treating the Raffia
To enhance dye absorption and promote even coloration, consider pre-treating your raffia basket:
Create a mordant solution by mixing one part white vinegar with four parts warm water.
Soak the basket in this solution for 30 minutes to an hour.
Gently squeeze out excess liquid without wringing or twisting the basket.
Allow the basket to air dry until it's slightly damp but not wet.
This pre-treatment helps open up the fibers and creates a more receptive surface for the dye to adhere to.
Protecting Work Surfaces
Before you begin dyeing, take steps to protect your work area:
Cover your work surface with plastic sheeting or old newspapers.
Wear gloves to protect your hands from stains.
Have plenty of old towels or rags on hand for spills or drips.
Work in a well-ventilated area to avoid inhaling dye fumes.
By taking the time to properly prepare your raffia basket and work area, you're setting the stage for a successful dyeing experience. With these steps completed, you're ready to move on to the exciting process of selecting and applying your chosen dye.
Choosing the Right Dye for Your Raffia Basket
Selecting the appropriate dye is a crucial decision that will significantly impact the outcome of your raffia basket dyeing project. There are several factors to consider when making this choice, including the type of dye, the desired color, and the overall effect you want to achieve.
Natural vs. Synthetic Dyes
When it comes to dyeing raffia, you have two main categories of dyes to choose from: natural and synthetic.
Natural Dyes
Natural dyes are derived from plants, minerals, or insects and offer a range of earthy, subtle hues:
Pros:
Eco-friendly and non-toxic
Create unique, organic color variations
Often produce softer, more muted tones
Cons:
Can be less colorfast than synthetic dyes
May require more time and effort to prepare
Limited color range compared to synthetic options
Popular natural dye sources for raffia include:
Onion skins (for golden and earthy tones)
Red cabbage (for pinks and soft purples)
Eucalyptus leaves and bark (for yellows, dusty pinks, and browns)
Turmeric (for vibrant yellows)
Hibiscus tea (for pinks and reds)
Black tea (for warm browns)
Synthetic Dyes
Synthetic dyes are chemically produced and offer a wide range of vibrant, consistent colors:
Pros:
Broad spectrum of color options
Generally more colorfast and long-lasting
Easier to achieve uniform results
Cons:
May contain harsh chemicals
Can be less environmentally friendly
May alter the natural texture of raffia if not used carefully
Popular synthetic dye options for raffia include:
Fabric dyes (like Rit or Dylon)
Acid dyes (for protein fibers)
Fiber-reactive dyes (for cellulose fibers)
Considering Color and Effect
When choosing your dye, think about the following:
Desired color intensity: Do you want a bold, vibrant hue or a more subtle, washed-out look?
Color compatibility: Consider how the dye will interact with the natural color of your raffia basket.
Color fastness: Research the longevity of different dye options to ensure your color will last.
Special effects: Some dyes allow for techniques like ombré or color blocking, which can create unique designs on your basket.
Testing Your Chosen Dye
Before committing to dyeing your entire basket, it's wise to conduct a small test:
Cut a small piece of raffia from an inconspicuous part of the basket or use a similar piece of raffia.
Apply the dye to this test piece following the manufacturer's instructions.
Observe how the color takes to the raffia and how it looks when dry.
If satisfied with the result, proceed with dyeing your basket. If not, adjust your technique or try a different dye.
By carefully considering your dye options and testing them beforehand, you can ensure that you choose the perfect color and method to revitalize your raffia basket. With your dye selected and tested, you're now ready to move on to the exciting process of applying color to your basket.
Dyeing Techniques for Raffia Baskets
Now that you've chosen your dye and prepared your raffia basket, it's time to explore the various techniques you can use to apply color. Each method offers unique advantages and can create different effects, allowing you to customize your basket to your exact preferences.
Immersion Dyeing
Immersion dyeing is one of the most common and straightforward methods for dyeing raffia baskets. This technique involves submerging the entire basket in a dye bath, resulting in an all-over color application.
Steps for Immersion Dyeing:
Prepare your dye bath according to the manufacturer's instructions, ensuring you have enough liquid to fully submerge your basket.
Wet your raffia basket with clean water to promote even dye absorption.
Gently lower the basket into the dye bath, making sure it's completely covered.
Use a stirring stick to move the basket around in the dye, ensuring all areas are exposed to the color.
Leave the basket in the dye bath for the recommended time, checking periodically for color intensity.
Once you've achieved the desired shade, remove the basket and rinse thoroughly with cool water until the water runs clear.
Pro tip: For a more even result, consider weighing down the basket in the dye bath to prevent floating.
Brush Dyeing
Brush dyeing allows for more control over color placement and is excellent for creating patterns or applying multiple colors to your raffia basket.
Steps for Brush Dyeing:
Mix your dye in small containers, one for each color you plan to use.
Using a soft-bristled brush, apply the dye to your basket in your desired pattern.
Work the dye into the fibers, ensuring even coverage in each section.
For multi-color designs, allow each color to dry slightly before applying the next to prevent bleeding.
Once you've finished applying all colors, allow the basket to dry completely before rinsing with cool water.
Pro tip: Use painter's tape to create clean lines between different colored sections.
Spray Dyeing
Spray dyeing is perfect for creating ombré effects or for applying a light, even wash of color to your raffia basket.
Steps for Spray Dyeing:
Dilute your dye according to the manufacturer's instructions and transfer it to a spray bottle.
Hang your raffia basket vertically or lay it flat on a protected surface.
Begin spraying the dye onto the basket, starting with a light mist and building up color gradually.
For an ombré effect, concentrate the spray more heavily on one area and gradually decrease intensity as you move away from it.
Allow the dye to dry completely before rinsing with cool water.
Pro tip: Practice your spray technique on a piece of cardboard before applying it to your basket to get a feel for the nozzle and color intensity.
Dip-Dyeing
Dip-dyeing is an excellent technique for creating color-blocked effects or gradients on your raffia basket.


brit.co
Steps for Dip-Dyeing:
Prepare your dye bath in a container deep enough to accommodate the portion of the basket you wish to dye.
Dip the desired section of your basket into the dye bath, holding it steady for even color application.
For a gradient effect, slowly pull the basket out of the dye bath over time, allowing less dye to absorb as you go.
Once you've achieved your desired look, remove the basket from the dye and allow excess dye to drip off.
Rinse the dyed portion with cool water until it runs clear, being careful not to wet the undyed sections.
Pro tip: Use clothespins or clips to hold the basket in place during the dipping process for more precise color lines.
Combining Techniques
Don't be afraid to experiment with combining different dyeing techniques to create unique effects on your raffia basket. For example, you could use immersion dyeing for a base color, followed by brush dyeing for added details or patterns.
Remember, regardless of the technique you choose, always follow the dye manufacturer's instructions for the best results. With these various methods at your disposal, you're well-equipped to transform your raffia basket into a one-of-a-kind accessory that reflects your personal style.
Fixing the Color: Ensuring Longevity
After you've successfully dyed your raffia basket, the next crucial step is to ensure that your newly applied color stays vibrant and doesn't fade or bleed over time. This process, known as fixing or setting the color, is essential for the longevity of your dyed raffia basket.
The Importance of Color Fixing
Color fixing serves several important purposes:
It helps the dye molecules bond more securely to the raffia fibers.
It reduces the likelihood of color bleeding or transferring onto other surfaces.
It enhances the color's resistance to fading from sunlight and washing.
Methods for Fixing Color on Raffia
There are several methods you can use to fix the color on your newly dyed raffia basket. The best method may depend on the type of dye you used and the specific care instructions provided by the dye manufacturer.
Vinegar Rinse Method
This method is particularly effective for natural dyes and some synthetic dyes:
Mix one part white vinegar with four parts cool water in a large basin.
Submerge your dyed raffia basket in this solution and gently agitate it for about 5 minutes.
Remove the basket and rinse it thoroughly with cool water until the water runs clear.
Allow the basket to air dry completely.
Salt Water Soak
Salt can help set colors, especially for plant-based dyes:
Dissolve 1/4 cup of salt in 4 cups of warm water.
Soak your dyed raffia basket in this solution for 15-20 minutes.
Rinse the basket thoroughly with cool water.
Air dry the basket away from direct sunlight.
Heat Setting
Some synthetic dyes respond well to heat setting:
After dyeing, allow your basket to dry completely.
Use an iron on a low heat setting, placing a cloth between the iron and the raffia basket.
Iron each section of the basket for about 30 seconds to help set the color.
Caution: Always test this method on a small, inconspicuous area first, as excessive heat can damage raffia fibers.
Commercial Dye Fixatives
There are commercial products specifically designed to set dyes:
Choose a fixative compatible with the type of dye you used.
Follow the manufacturer's instructions carefully for application.
These products often involve soaking the dyed item in a prepared solution for a specified time.
Post-Fixing Care
After fixing the color, proper care is essential to maintain the vibrancy of your dyed raffia basket:
Allow the basket to dry completely before using it.
For the first few uses, avoid prolonged contact with light-colored fabrics or surfaces, as some minimal color transfer may still occur.
Store the basket away from direct sunlight when not in use to prevent fading.
If the basket gets wet, allow it to air dry naturally, avoiding heat sources like radiators or direct sunlight.
Monitoring Color Fastness
Even with proper fixing, it's a good idea to monitor your basket's color fastness over time:
Periodically check for any signs of color bleeding or fading.
If you notice any issues, you may need to re-dye or touch up certain areas.
Keep in mind that some fading over time is natural, especially with frequent use or exposure to sunlight.
By taking the time to properly fix the color on your newly dyed raffia basket, you're ensuring that your creative efforts will last. This step, combined with ongoing care, will help your revitalized raffia basket remain a stunning and unique accessory for years to come.
Caring for Your Dyed Raffia Basket
After investing time and creativity into dyeing your raffia basket, proper care is essential to maintain its beauty and extend its lifespan. By following these guidelines, you can ensure that your newly dyed raffia basket remains a cherished accessory for years to come.
Cleaning Your Dyed Raffia Basket
Regular cleaning helps preserve the color and structure of your basket:
Dust Removal:
Use a soft-bristled brush to gently remove dust and debris regularly.
For stubborn dirt, use a slightly damp cloth, being careful not to saturate the raffia.
Spot Cleaning:
For small stains, use a mild soap solution and a soft cloth.
Dab the stain gently, avoiding rubbing which can spread the stain or damage the fibers.
Rinse the area with a clean, damp cloth and allow it to air dry.
Deep Cleaning (when necessary):
Fill a basin with cool water and add a small amount of mild, color-safe detergent.
Submerge the basket and gently agitate it in the water.
Rinse thoroughly with clean, cool water until all soap is removed.
Press out excess water gently without wringing or twisting the basket.
Drying and Storage
Proper drying and storage are crucial for maintaining the shape and color of your raffia basket:
Drying:
Always air dry your raffia basket away from direct sunlight and heat sources.
Stuff the basket with acid-free tissue paper to help maintain its shape while drying.
Place the basket on a clean, dry towel and reshape it gently if needed.
Storage:
Store your raffia basket in a cool, dry place away from direct sunlight.
Use a dust bag or pillowcase to protect it when not in use.
Avoid storing in plastic bags, which can trap moisture and lead to mildew.
If storing long-term, stuff the basket lightly with acid-free tissue to help maintain its shape.
Preventing Color Fading
To keep your dyed raffia basket looking vibrant:
Limit Sun Exposure:
Avoid leaving your basket in direct sunlight for extended periods.
When outdoors, try to keep the basket in shaded areas when possible.
Rotate Usage:
If you have multiple baskets, rotate their use to prevent excessive wear and sun exposure to any one basket.
Color Touch-Ups:
For minor color fading, consider using fabric markers or paint designed for natural fibers to touch up small areas.
Handling with Care
Mindful handling can prevent unnecessary wear and tear:
Avoid Overloading:
Don't overstuff your raffia basket, as this can strain the fibers and affect its shape.
Gentle Handling:
Pick up your basket by the handles or straps, not by the body of the basket.
Be cautious of rough surfaces that could snag or abrade the raffia fibers.
Moisture Protection:
While raffia is relatively durable, prolonged exposure to moisture can damage it.
If your basket gets wet, allow it to air dry naturally and reshape if necessary.
Seasonal Care
Adjust your care routine based on the season:
Summer Care:
Be extra vigilant about sun exposure during bright summer months.
Consider using a fabric protector spray to add an extra layer of protection against moisture and stains.
Winter Storage:
If storing your raffia basket for the winter, ensure it's clean and completely dry before putting it away.
Check on stored baskets periodically to ensure no moisture or pests have affected them.
Professional Maintenance
For valuable or intricately dyed raffia baskets, consider professional care:
Seek out specialists who have experience with natural fiber accessories.
Professional cleaning or repair may be worthwhile for high-end or sentimental pieces.
By following these care instructions, you can ensure that your dyed raffia basket remains a beautiful and functional accessory. Regular maintenance not only preserves the vibrant colors you've applied but also extends the overall life of your unique, handcrafted basket. With proper care, your revitalized raffia basket will continue to be a standout piece in your accessory collection, reflecting your personal style and creative efforts for seasons to come.
Troubleshooting Common Dyeing Issues
Even with careful preparation and execution, you may encounter some challenges when dyeing your raffia basket. Understanding how to address these common issues can help you achieve the best possible results and salvage projects that don't turn out as expected.
Uneven Color Distribution
If you notice that the color on your raffia basket is patchy or inconsistent, there are several potential solutions:
Re-dyeing:
If the color is too light in some areas, consider re-dyeing the entire basket.
Ensure the basket is thoroughly wet before re-immersing it in the dye bath.
Spot Treatment:
For small areas of uneven color, use a small brush to apply dye directly to those spots.
Blend the edges carefully to avoid creating new, obvious boundaries.
Embracing the Look:
Sometimes, slight color variations can add character to your basket, creating a unique, artisanal appearance.
Color Bleeding
If you notice the dye bleeding onto other surfaces or when the basket gets wet:
Additional Rinsing:
Rinse the basket thoroughly in cool water until the water runs clear.
Repeat the color fixing process using a vinegar rinse or salt soak.
Color Sealant:
Apply a fabric sealant designed for dyed natural fibers to help lock in the color.
Dry Cleaning:
For persistent bleeding, consider having the basket professionally dry cleaned.
Fading Colors
If your newly dyed raffia basket starts to fade quickly:
UV Protection:
Apply a UV-resistant spray designed for fabrics to help protect against sun fading.
Storage Solutions:
Store the basket in a dark place when not in use to minimize light exposure.
Re-dyeing:
For significant fading, consider re-dyeing the basket, possibly with a darker shade.
Stiff or Damaged Fibers
If the dyeing process has left your raffia basket feeling stiff or brittle:
Conditioning Treatment:
Mix equal parts water and fabric softener, and lightly mist the basket.
Gently work the solution into the fibers and allow to air dry.
Oil Treatment:
Apply a small amount of coconut oil or jojoba oil to soften the fibers.
Use sparingly to avoid over-saturating the raffia.
Gentle Manipulation:
Carefully flex and bend the raffia to help restore its natural flexibility.
Unwanted Color Results
If the final color of your basket isn't what you expected:
Color Stripping:
For drastic color changes, use a color remover designed for natural fibers before re-dyeing.
Color Layering:
Apply a different color over the existing dye to create a new shade.
Test this technique on a small area first to ensure the desired result.
Embellishment:
Consider adding embroidery, beads, or other decorations to complement or distract from the unexpected color.
Dye Resistance
If your raffia basket isn't absorbing the dye as expected:
Pre-treatment:
Soak the basket in a mixture of warm water and vinegar before dyeing to help open up the fibers.
Dye Selection:
Experiment with different types of dyes that may be more suitable for raffia fibers.
Heat Application:
If safe for the dye you're using, try applying gentle heat during the dyeing process to encourage color absorption.
Environmental Concerns
If you're worried about the environmental impact of your dyeing project:
Natural Alternatives:
Explore natural dye options made from plants or food waste.
Dye Disposal:
Research proper disposal methods for your specific dye to minimize environmental impact.
Water Conservation:
Collect and reuse rinse water for multiple dyeing projects when possible.
By being prepared to address these common issues, you can approach your raffia basket dyeing project with confidence. Remember that sometimes unexpected results can lead to unique and beautiful outcomes. With patience and creativity, you can overcome most dyeing challenges and create a stunning, personalized raffia basket that reflects your style and craftsmanship.
Creative Ideas for Customizing Your Dyed Raffia Basket
Once you've mastered the basics of dyeing your raffia basket, you might want to explore more creative ways to make your accessory truly unique. Here are some innovative ideas to take your raffia basket customization to the next level:
Color Blocking Techniques
Create striking visual effects by applying different colors to distinct sections of your basket:
Geometric Patterns:
Use painter's tape to create clean lines between color blocks.
Apply different dyes to each section for a modern, graphic look.
Ombré Effect:
Gradually blend two or more colors for a smooth transition.
Start with the darkest shade at the bottom and work your way up to lighter hues.
Dip-Dye Designs:
Dip only the bottom portion of your basket into the dye for a two-tone effect.
Experiment with dipping at angles for unique patterns.
Stenciling and Painting
Add intricate designs or patterns using stencils and fabric paint:
Nature-Inspired Motifs:
Use leaf or flower stencils to create a botanical theme.
Paint delicate butterflies or dragonflies for a whimsical touch.
Geometric Shapes:
Create repeating patterns with triangles, circles, or hexagons.
Use metallic paint for an eye-catching contrast against the dyed raffia.
Personalized Monograms:
Stencil your initials or a meaningful word onto your basket.
Experiment with different fonts and sizes for varied effects.
Embellishments and Accessories
Enhance your dyed raffia basket with additional decorative elements:
Beadwork:
Sew colorful beads along the edges or in patterns across the basket.
Create tassels or fringes using beads for added texture.
Embroidery:
Use embroidery floss to add intricate designs or text.
Try cross-stitch patterns for a rustic, handcrafted look.
Fabric Accents:
Attach fabric patches or appliqués for a mixed-media effect.
Add a fabric lining in a complementary color or pattern.
Textural Variations
Experiment with creating different textures on your raffia basket:
Weaving Techniques:
Incorporate different weaving patterns into sections of your basket.
Use contrasting colors of raffia for added visual interest.
Fringe and Tassels:
Add raffia fringe along the bottom or sides of the basket.
Create colorful tassels to hang from the handles or corners.
Macramé Details:
Incorporate macramé knots or patterns into the design of your basket.
Use dyed raffia cords for these decorative elements.
Eco-Friendly Embellishments
Embrace sustainability by using natural or upcycled materials:
Seashell Accents:
Attach small seashells or sea glass for a beach-inspired look.
Use natural twine or fishing line for an authentic coastal feel.
Pressed Flowers:
Incorporate pressed flowers or leaves under a clear sealant.
Create a collage effect with various botanical elements.
Upcycled Materials:
Repurpose old jewelry or buttons as decorative elements.
Use fabric scraps to create patchwork designs on your basket.
Functional Additions
Enhance the practicality of your raffia basket with useful additions:
Interior Pockets:
Sew in fabric pockets for better organization.
Use contrasting colors or patterns for a fun interior surprise.
Closure Upgrades:
Add a zipper or magnetic snap for secure closure.
Create a drawstring top for an adjustable opening.
Strap Variations:
Replace or enhance the original straps with leather or fabric alternatives.
Add adjustable buckles for versatile carrying options.
Seasonal Themes
Customize your basket to reflect different seasons or holidays:
Summer Vibes:
Use bright, tropical colors and add flamingo or pineapple motifs.
Incorporate raffia flowers or palm leaf designs.
Autumn Inspiration:
Dye your basket in warm, earthy tones and add leaf patterns.
Attach small, faux autumn leaves or acorns as accents.
Festive Flair:
Add sparkly elements or metallic paint for holiday occasions.
Incorporate seasonal symbols like snowflakes or hearts.
Digital Printing Techniques
For those with access to digital crafting tools:
Heat Transfer:
Design and print custom images using heat transfer paper.
Apply the designs to your raffia basket using an iron or heat press.
UV Printing:
If available, use UV printing technology for detailed, durable designs.
This method allows for intricate patterns and photorealistic images.
By exploring these creative customization ideas, you can transform your dyed raffia basket into a truly one-of-a-kind accessory. Remember to let your personal style guide your choices, and don't be afraid to combine multiple techniques for a truly unique result. With a little imagination and some crafting skills, your raffia basket can become a wearable work of art that reflects your creativity and individuality.
Conclusion: Embracing Your Newly Revitalized Raffia Basket
As we wrap up this comprehensive guide on raffia basket dyeing, it's clear that the process of transforming a simple raffia basket into a personalized, vibrant accessory is both an art and a science. From understanding the unique properties of raffia to mastering various dyeing techniques and troubleshooting common issues, you've gained a wealth of knowledge to embark on your own raffia basket dyeing adventure.
The journey of revitalizing your raffia basket goes beyond mere color application. It's an opportunity to express your creativity, experiment with different techniques, and create a truly unique piece that reflects your personal style. Whether you've opted for a solid, vibrant hue, a subtle ombré effect, or an intricate pattern, your newly dyed raffia basket is now a testament to your craftsmanship and artistic vision.
Remember that the care you put into maintaining your dyed raffia basket is just as important as the dyeing process itself. By following the care instructions and storage tips provided, you can ensure that your revitalized accessory remains a cherished part of your wardrobe for years to come.
As you carry your newly dyed raffia basket, take pride in the fact that you've not only refreshed its appearance but also extended its life, contributing to a more sustainable approach to fashion.